A Beginner’s Guide to Arduino Coding Basics
Introduction:
Arduino coding is a crucial skill for anyone interested in electronics and DIY projects. With Arduino, you can build a wide range of devices, from simple LED blinkers to complex robots and home automation systems. This guide will provide you with a solid foundation in Arduino coding, so you can bring your ideas to life.
Before we dive into the specifics of Arduino coding, let’s take a moment to understand what Arduino is and why it has become so popular among makers and hobbyists. Arduino is a microcontroller platform that consists of a programmable board and a development environment. The board is equipped with input and output pins, which can be used to connect various sensors, actuators, and other electronic components.
The Arduino development environment is where you write, compile, and upload code to the Arduino board. It is based on the Processing programming language and provides a simplified interface for writing code. Even if you have no prior programming experience, Arduino’s beginner-friendly environment makes it easy to get started.
Now, let’s talk about the basics of Arduino coding. At its core, Arduino coding involves writing instructions that tell the microcontroller what to do. These instructions are written in a language called C++, which is a popular programming language known for its versatility and efficiency.
Arduino code is organized into functions, which are blocks of code that perform specific tasks. The most important function in an Arduino program is the void setup() function, which is executed once when the board powers up. This function is used to initialize variables, set pin modes, and perform other setup tasks.
After the setup() function, the Arduino continuously executes another function called void loop(). This function is where you write the main code for your project. The code inside the loop() function is executed repeatedly until the board is powered off or reset.
Arduino code can interact with the physical world by reading inputs from sensors and controlling outputs like LEDs, motors, and displays. To do this, you need to use the input and output pins on the Arduino board. These pins can be configured as either digital or analog, depending on the type of signal you want to read or send.
Arduino coding also involves using libraries, which are pre-written code modules that provide additional functionality. Libraries can simplify complex tasks and save you time by providing ready-to-use code for common operations. Arduino has a vast library ecosystem, with libraries for everything from controlling servos to connecting to Wi-Fi networks.
In this guide, we will cover the basic syntax of Arduino code, including variables, data types, control structures, and functions. We will also explore how to use libraries to extend the capabilities of your Arduino projects. By the end of this guide, you will have a solid understanding of Arduino coding basics and be ready to start building your own projects.
What is Arduino?
Arduino is a versatile microcontroller board that consists of a programmable chip and a set of input/output pins. It can be connected to various sensors, actuators, and other electronic components to create interactive projects. Arduino boards are widely used in the maker community, and they provide an accessible platform for learning and experimenting with electronics and coding.
One of the key features of Arduino is its simplicity and ease of use. The board is designed to be beginner-friendly, with a straightforward programming language and a user-friendly development environment. This makes it an ideal choice for those who are new to electronics and programming.
Arduino boards come in a variety of models, each with its own set of capabilities and features. The most basic Arduino board, the Arduino Uno, is equipped with 14 digital input/output pins, 6 analog inputs, a USB connection for programming and power, and a power jack. It also has a built-in LED and a reset button.
One of the advantages of Arduino is its open-source nature. The design and schematics of Arduino boards are freely available, allowing anyone to modify and customize them according to their needs. This has led to a vibrant community of Arduino enthusiasts who share their projects, code, and ideas.
Arduino can be used for a wide range of applications. It is commonly used in robotics, home automation, wearable technology, and interactive art installations. With its ability to interface with various sensors and actuators, Arduino can be used to build projects that respond to the environment, such as temperature and humidity sensors, motion detectors, and light sensors.
Getting Started with Arduino Coding Basics
Before we dive into the coding aspect, let’s make sure you have the necessary tools and software to get started with Arduino:
- An Arduino board (such as Arduino Uno or Arduino Nano)
- A USB cable to connect the Arduino board to your computer
- The Arduino IDE (Integrated Development Environment) software, which you can download for free from the Arduino website
Once you have the hardware and software ready, follow these steps to start coding with Arduino:
- Connect your Arduino board to your computer using the USB cable. Make sure the board is properly connected and the USB cable is securely plugged in.
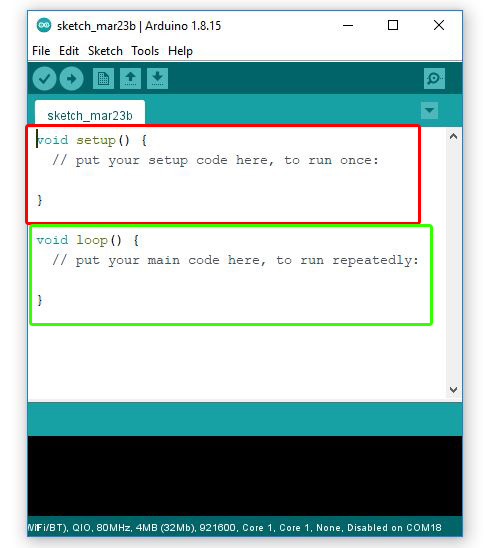
- Open the Arduino IDE software on your computer. You should see a blank sketch (code file) with two empty functions:
setup()andloop(). - In the
setup()function, you can initialize any variables, set pin modes, or configure any other settings that need to be done once at the beginning of your program. - In the
loop()function, you can write the main code that will be executed repeatedly as long as the Arduino board is powered on. This is where you can control the behavior of your Arduino board based on various conditions and inputs. - Start writing your code in the
setup()andloop()functions. Arduino programming is based on the C/C++ language, so you can use familiar programming constructs like if statements, for loops, and functions. - Compile your code by clicking on the checkmark icon in the top-left corner of the Arduino IDE. This will check for any syntax errors in your code.
- If there are no syntax errors, you can upload your code to the Arduino board by clicking on the right arrow icon next to the checkmark. This will compile and upload your code to the Arduino board.
- Once the code is uploaded, you can see the output of your program on the Arduino board. This can be in the form of blinking LEDs, controlling motors, reading sensors, or any other action you have programmed.
- Debug and iterate on your code as needed. If your program is not working as expected, you can use the Serial Monitor in the Arduino IDE to print debug messages and check the values of variables in real-time.
With these steps, you are now ready to start coding with Arduino. Remember to experiment, learn from examples, and have fun exploring the endless possibilities of Arduino programming!
Setting up the Arduino IDE
After installing the Arduino IDE, open it on your computer. You will see a blank sketch (a sketch is the term used for an Arduino program). Go to the “Tools” menu and select the board you are using (e.g., Arduino Uno) and the port to which your Arduino board is connected.
Once you have selected the appropriate board and port, you are ready to start writing your Arduino program. The Arduino IDE provides a simple and intuitive interface for writing code. The main window is divided into two sections: the text editor and the message area.
The text editor is where you will write your code. You can also use the built-in examples and libraries to quickly get started with your project.
The message area, located at the bottom of the IDE, displays important information such as compilation errors and upload progress. It is essential to pay attention to this area as it provides valuable feedback on the status of your program.
Before you start writing your code, it is essential to have a clear understanding of what you want your Arduino to do. This involves defining the inputs and outputs of your project and understanding how to interact with them using the Arduino programming language.
The Arduino programming language is based on C/C++, but it has its own set of functions and libraries specifically designed for working with the Arduino hardware. These functions and libraries make it easy to read inputs from sensors, control actuators, and communicate with other devices.
Once you have a clear understanding of your project requirements, you can start writing your code in the Arduino IDE. The code is written in functions, which are blocks of code that perform a specific task. The main function, called “setup,” is where you initialize your project, while the “loop” function is where the main logic of your program resides.
As you write your code, you can use comments to explain what each section of code does. Comments are lines of code that are ignored by the compiler and are used to provide information to other programmers or to remind yourself of what a particular section of code does.
Once you have written your code, you can click on the “Verify” button to check for any syntax errors. If there are no errors, you can proceed to upload your code to the Arduino board by clicking on the “Upload” button. The IDE will compile your code and transfer it to the Arduino board, where it will start running.
With the Arduino IDE set up and your code ready, you are now ready to start experimenting and building your own Arduino projects. The possibilities are endless, from simple LED blinking projects to more complex robotics and home automation systems.
Understanding the Arduino Sketch
An Arduino sketch consists of two essential functions: setup() and loop().
The setup() function is called once when the Arduino board is powered on or reset. It is used to initialize variables, set pin modes, and perform any necessary setup tasks.
The loop() function is called repeatedly after the setup() function. It contains the main code that will run continuously as long as the Arduino board is powered on.
Within the setup() function, you can define the initial state of variables and set the mode of the pins you will be using. This is where you can configure the Arduino board to communicate with other devices or sensors, such as setting the baud rate for serial communication or initializing an LCD display.
The loop() function is where the main action happens. It is called repeatedly in an infinite loop, allowing you to continuously execute a series of instructions. This is where you can read input from sensors, perform calculations, control outputs, and make decisions based on the data you receive.
For example, let’s say you are building a temperature monitoring system using an Arduino and a temperature sensor. In the setup() function, you would initialize the sensor, set the pin mode for the sensor, and configure any necessary settings. In the loop() function, you would continuously read the temperature from the sensor, display it on an LCD screen, and take action based on the temperature value, such as turning on a fan if the temperature exceeds a certain threshold.
The loop() function is where you have the flexibility to create complex logic and control the behavior of your Arduino board. You can use conditional statements, loops, and functions to create sophisticated programs that can interact with the physical world.
Understanding the structure and purpose of the setup() and loop() functions is crucial for writing effective Arduino sketches. By properly utilizing these functions, you can create programs that perform specific tasks, respond to external inputs, and control various components connected to the Arduino board.
Main things in Arduino Coding:
Brackets:
- Parentheses ( ): Parentheses are used for grouping expressions, passing arguments to functions, and defining function parameters. They help organize code and specify the inputs or parameters required for a particular operation.
- Curly Brackets { }: Curly brackets, also known as braces, define the beginning and end of code blocks in Arduino. They enclose multiple statements, forming the body of functions, loops, conditional statements, and other code structures.
Comments:
- Single line comment: Single-line comments in Arduino are denoted by two forward slashes //. They allow programmers to add explanatory notes or remarks to individual lines of code. Anything following // on a line is treated as a comment and ignored during compilation.
- Multi-line comment: Multi-line comments in Arduino are enclosed within /* and */. They enable programmers to comment out multiple lines of code or add longer explanations. Everything between /* and */ is treated as a comment and ignored by the compiler.
Time:
- Time in Arduino: Time-related functions in Arduino, such as millis() and micros(), measure the elapsed time since the Arduino board started running the current program. They return values representing milliseconds or microseconds, respectively, providing a basis for timing operations.
PinMode():
- pinMode(): pinMode() is a function used to configure the mode (input or output) of a specific pin on the Arduino board. It specifies whether a pin will be used to read incoming signals (INPUT) or send output signals (OUTPUT).
DigitalWrite():
- digitalWrite(): digitalWrite() is used to set the digital output state of a pin configured as an output. It accepts two arguments: the pin number and the desired state (HIGH or LOW). This function is commonly used to turn LEDs on or off and control other digital devices.
analogWrite():
- analogWrite(): analogWrite() generates a Pulse Width Modulation (PWM) signal on pins capable of PWM output. It simulates analog output by varying the duty cycle of the signal. The function accepts a pin number and a value ranging from 0 (fully off) to 255 (fully on) to control the intensity of the output.
Delay()
- delay(): delay() is used to pause the execution of the program for a specified duration in milliseconds. It halts the program flow for the specified time period, allowing for controlled timing between actions or events.
Exploring Arduino Libraries
Arduino libraries are pre-written code modules that provide additional functionality for your projects. They allow you to easily interface with sensors, displays, motors, and other components. The Arduino IDE comes with a set of standard libraries, and you can also find numerous third-party libraries available for download.
To use a library, you need to install it in the Arduino IDE. Go to the “Sketch” menu, select “Include Library,” and choose the library you want to use. Once the library is installed, you can include it in your sketch by adding the following line at the beginning of your code:
#include <library_name.h>
Make sure to replace library_name with the actual name of the library you want to include.
Arduino libraries are a powerful tool for expanding the capabilities of your Arduino projects. They provide a wide range of functions and features that can save you time and effort in developing your code. Whether you need to control a specific sensor, display data on an LCD screen, or drive a motor, there is likely a library available that can help simplify the process.
When choosing a library, it’s important to consider factors such as compatibility with your Arduino board, the level of community support and documentation available, and the specific features and functionality provided by the library. The Arduino website and other online resources are great places to find information and reviews about different libraries, as well as examples and tutorials that demonstrate how to use them.
Installing a library in the Arduino IDE is a straightforward process. Once you have downloaded the library files, you can simply navigate to the “Sketch” menu, select “Include Library,” and choose “Add .ZIP Library.” This will open a file browser where you can locate and select the downloaded library file. The IDE will then automatically extract and install the library, making it available for use in your projects.
Writing Your First Arduino Code
Let’s start with a simple example to blink an LED connected to one of the Arduino’s digital pins. Here’s the code:
|
1 2 3 4 5 6 7 8 9 10 |
int led=13; void setup() { pinMode(led, OUTPUT); } void loop() { digitalWrite(led, HIGH); delay(1000); digitalWrite(led, LOW); delay(1000); } |
Let’s break down the code:
int led = 13;: This line declares a variable named led and initializes it with the value 13. This is the pin number to which the LED is connected.
void setup() { pinMode(led, OUTPUT); }: The setup() function is a standard Arduino function that is executed once when the board is powered up or reset. In this function, pinMode(led, OUTPUT) configures the pin defined by the variable led (pin 13) as an output pin, indicating that the Arduino will be sending signals to the LED connected to this pin.
void loop() { … }: The loop() function is another standard Arduino function that runs continuously after the setup() function completes. The code inside loop() will repeat indefinitely until the board loses power or is reset.
Inside the loop() function:
digitalWrite(led, HIGH);: This line sets the pin specified by led (pin 13) to a high voltage level, turning the LED on.
delay(1000);: This line pauses the execution of the program for 1000 milliseconds (1 second), so the LED remains on for one second.
digitalWrite(led, LOW);: This line sets the pin specified by led (pin 13) to a low voltage level, turning the LED off.
delay(1000);: This line again pauses the execution of the program for 1000 milliseconds (1 second), keeping the LED off for one second.
This sequence of turning the LED on for one second and then off for one second will repeat indefinitely as long as the Arduino board is powered on. This code essentially creates a blinking LED effect.
Upload the sketch to your Arduino board and watch as the LED starts blinking. Congratulations! You have successfully completed your first Arduino project.
Once you have mastered the Arduino Coding basics, you can move on to more advanced projects. For example, you can build a temperature and humidity monitoring system using a DHT11 sensor. This project will require additional components, such as the DHT11 sensor and a display module.